

The chat bot is not code inside the plugin: Opensolr runs it, and the plugin takes you straight to it. In WordPress, go to Settings › Opensolr Search and open the Chat Bot tab.
The four steps
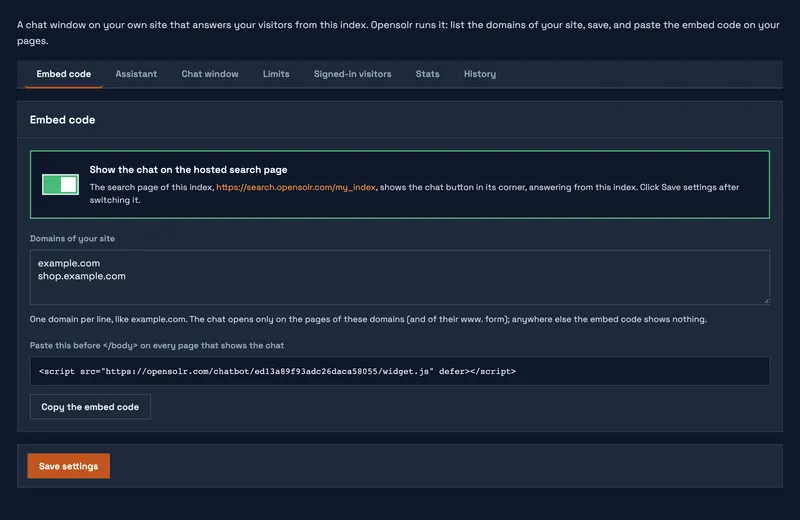
- On the Chat Bot tab, click Open the Chat Bot of your index. It opens the Chat Bot of your index in the Opensolr Control Panel (sign in if asked).
- On the Embed code tab there, write the domain of your site under Domains of your site, one per line, like
example.com. Its www. form is included. - Click Save settings.
- Copy the embed code shown there and add it to the pages of your site where you want the chat. It is one line:
<script src="https://opensolr.com/chatbot/YOUR_CHAT_ID/widget.js" defer></script>That is all: the next visitor of those pages sees the chat button. The chat opens only on the domains you listed, so a copy of your embed code on another site shows nothing and does not use your plan. More about the embed code, and what to add if your site sends a Content-Security-Policy: Put the chat on your site.
If the tab asks you to connect an index
The Chat Bot tab needs the plugin connected to your Opensolr Index first: Connect your Opensolr account. Then fill the index with your content, with the Data Crawler or Data Ingestion, so the chat has something to answer from.
Chat Bot pages
- Chat Bot overview
- Turn it on in four steps
- Its settings, stats and history