Opensolr Web Crawler — Site Search Solution
From zero to a live AI-powered search engine in minutes. No DevOps. No ML expertise. Just a few clicks.
Opensolr Search for Drupal
Drop-in AI-powered search for Drupal 10 & 11. Uses the Web Crawler you’re reading about and a real-time Data Ingestion API — both working together in one module. Hybrid vector + keyword search, faceted navigation, autocomplete, analytics dashboard. Zero code required.
Drupal Search Docs →What is Opensolr?
Opensolr is a managed Apache Solr Cloud hosting platform — the infrastructure, the configuration, the monitoring, the backups, and the scaling, all handled for you. You get a fully operational Solr index in under a minute, with a comprehensive management UI that covers everything from field configuration to query debugging.
Schema editor, query debugger, synonyms, stopwords, field boosts — all in the browser. No SSH needed.
Learn more →
7-day searchable error log with smart fix suggestions, weekly digests, and query-level analytics.
Learn more →
One-click snapshot backups of your Opensolr index. Restore to any previous state instantly.
Learn more →
Need high availability? Opensolr Resilient Cluster adds master+replica replication with automatic failover.
Learn more →
IP whitelisting, per-index passwords, CORS management, and 2FA for your account.
Learn more →
Direct Solr API access, plus the Opensolr REST API for index management, commits, stats, and more.
Learn more →
On top of all that: the Web Crawler
The Opensolr Web Crawler transforms any Solr index into a complete Algolia / Elasticsearch alternative — with dense vector search (BGE-m3, 1024-dim), automatic AI summarization (LLM/RAG), an embeddable search UI, query elevation, click analytics, and no-results detection — all built in, all automatic, zero integration work. Point it at your website and it does the rest.
Get Started — Step by Step
Create a free account on opensolr.com. No credit card required to start.
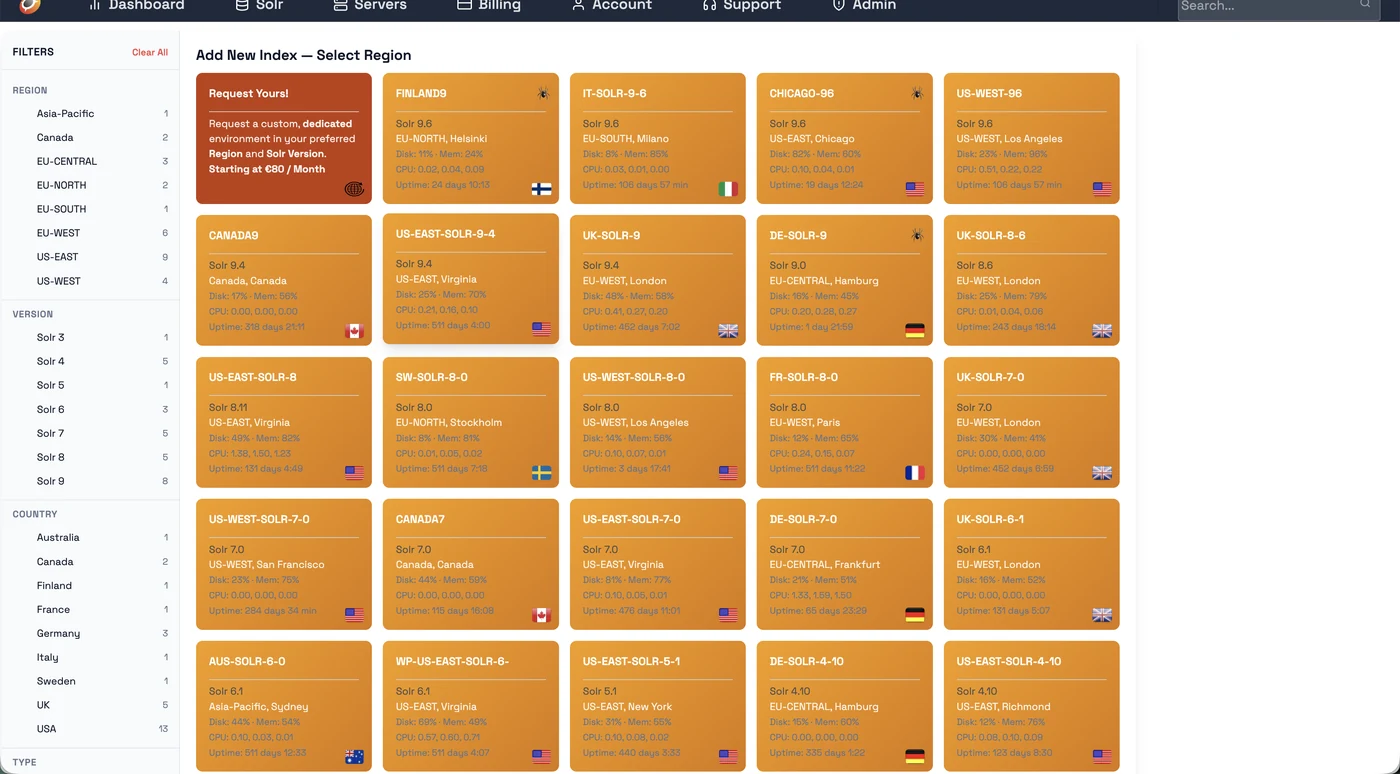
Go to Solr → Add New Index. On the left sidebar, filter by Crawler = YES to show only servers with the web crawler. Pick your region.
⚠️ Important: Name your index with the suffix __dense (two underscores + "dense") — e.g. mysite__dense. Only indexes with this suffix get 1024-dim BGE-m3 vector embeddings enabled.
We deploy dedicated web crawler servers wherever you need them. Choose from available regions when creating your index, or contact us to get a dedicated crawler server deployed in your own region for optimal crawl speed and latency.
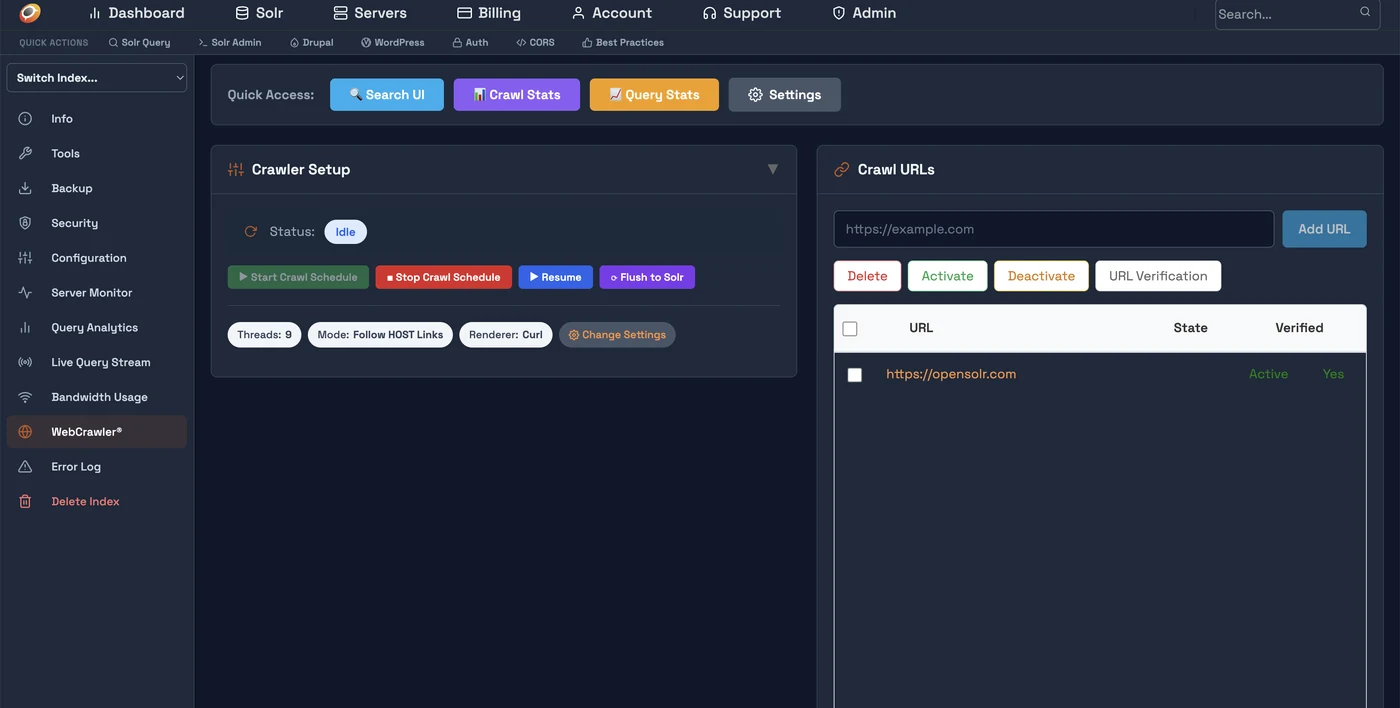
Click on the index name to open the Index Control Panel. In the left sidebar, click WebCrawler. You'll see the Crawler Setup panel and the Crawl URLs panel.
Click Add URL and enter your sitemap (https://example.com/sitemap.xml) or homepage URL. Then click URL Verification — upload the provided verification file to /opensolr-verification/YOUR_CODE.txt on your web server. Verification runs automatically every 5 minutes.
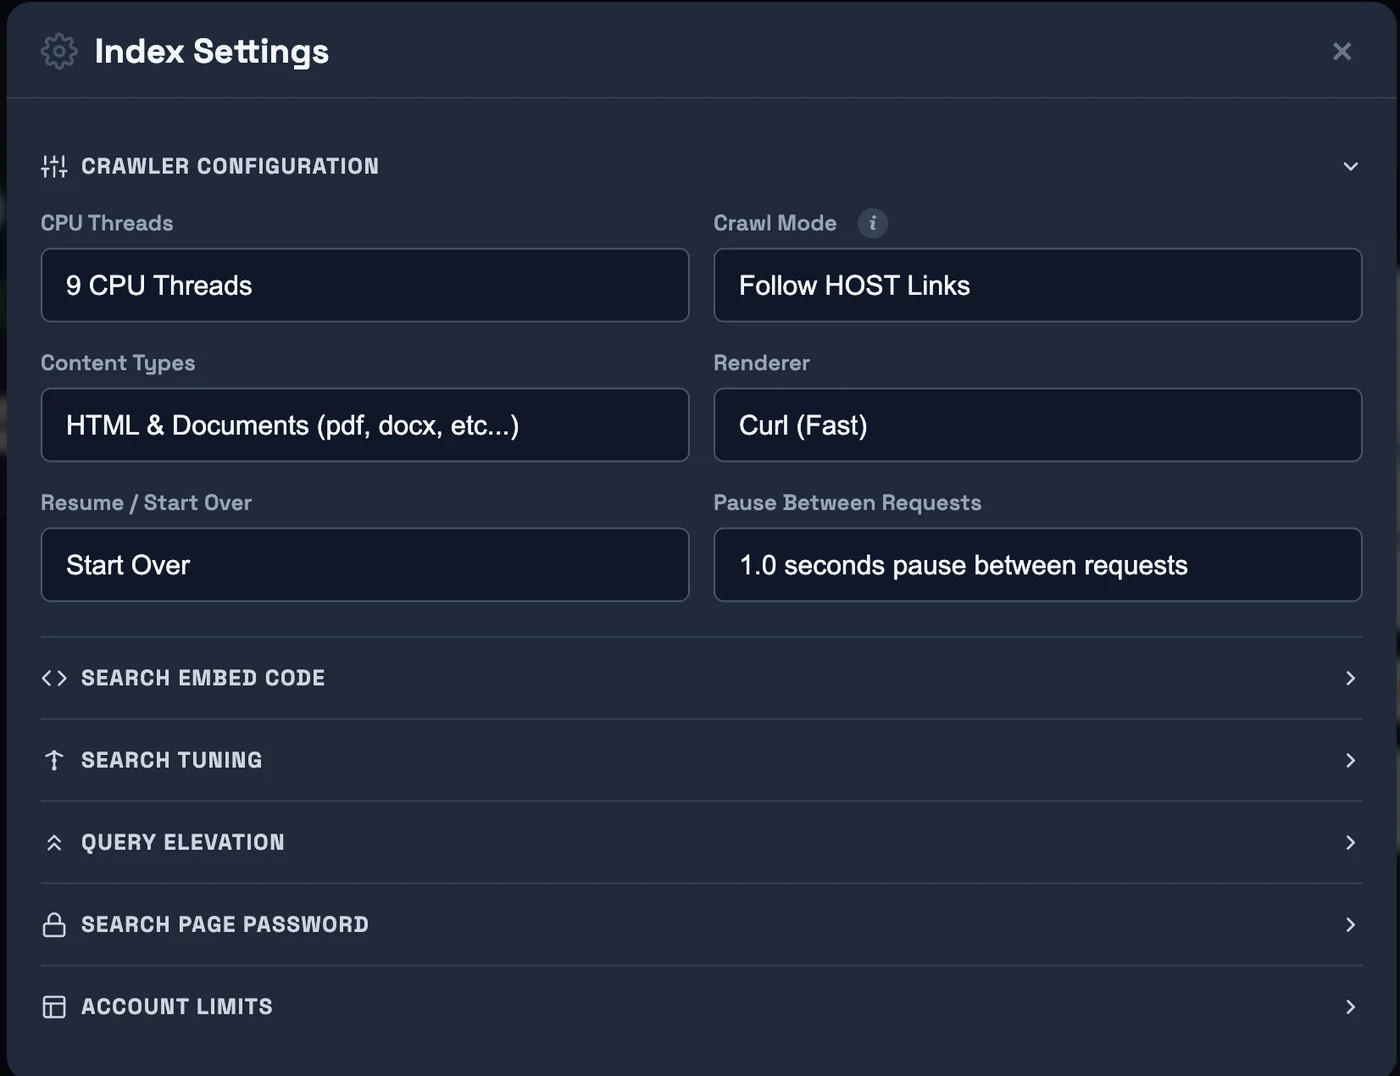
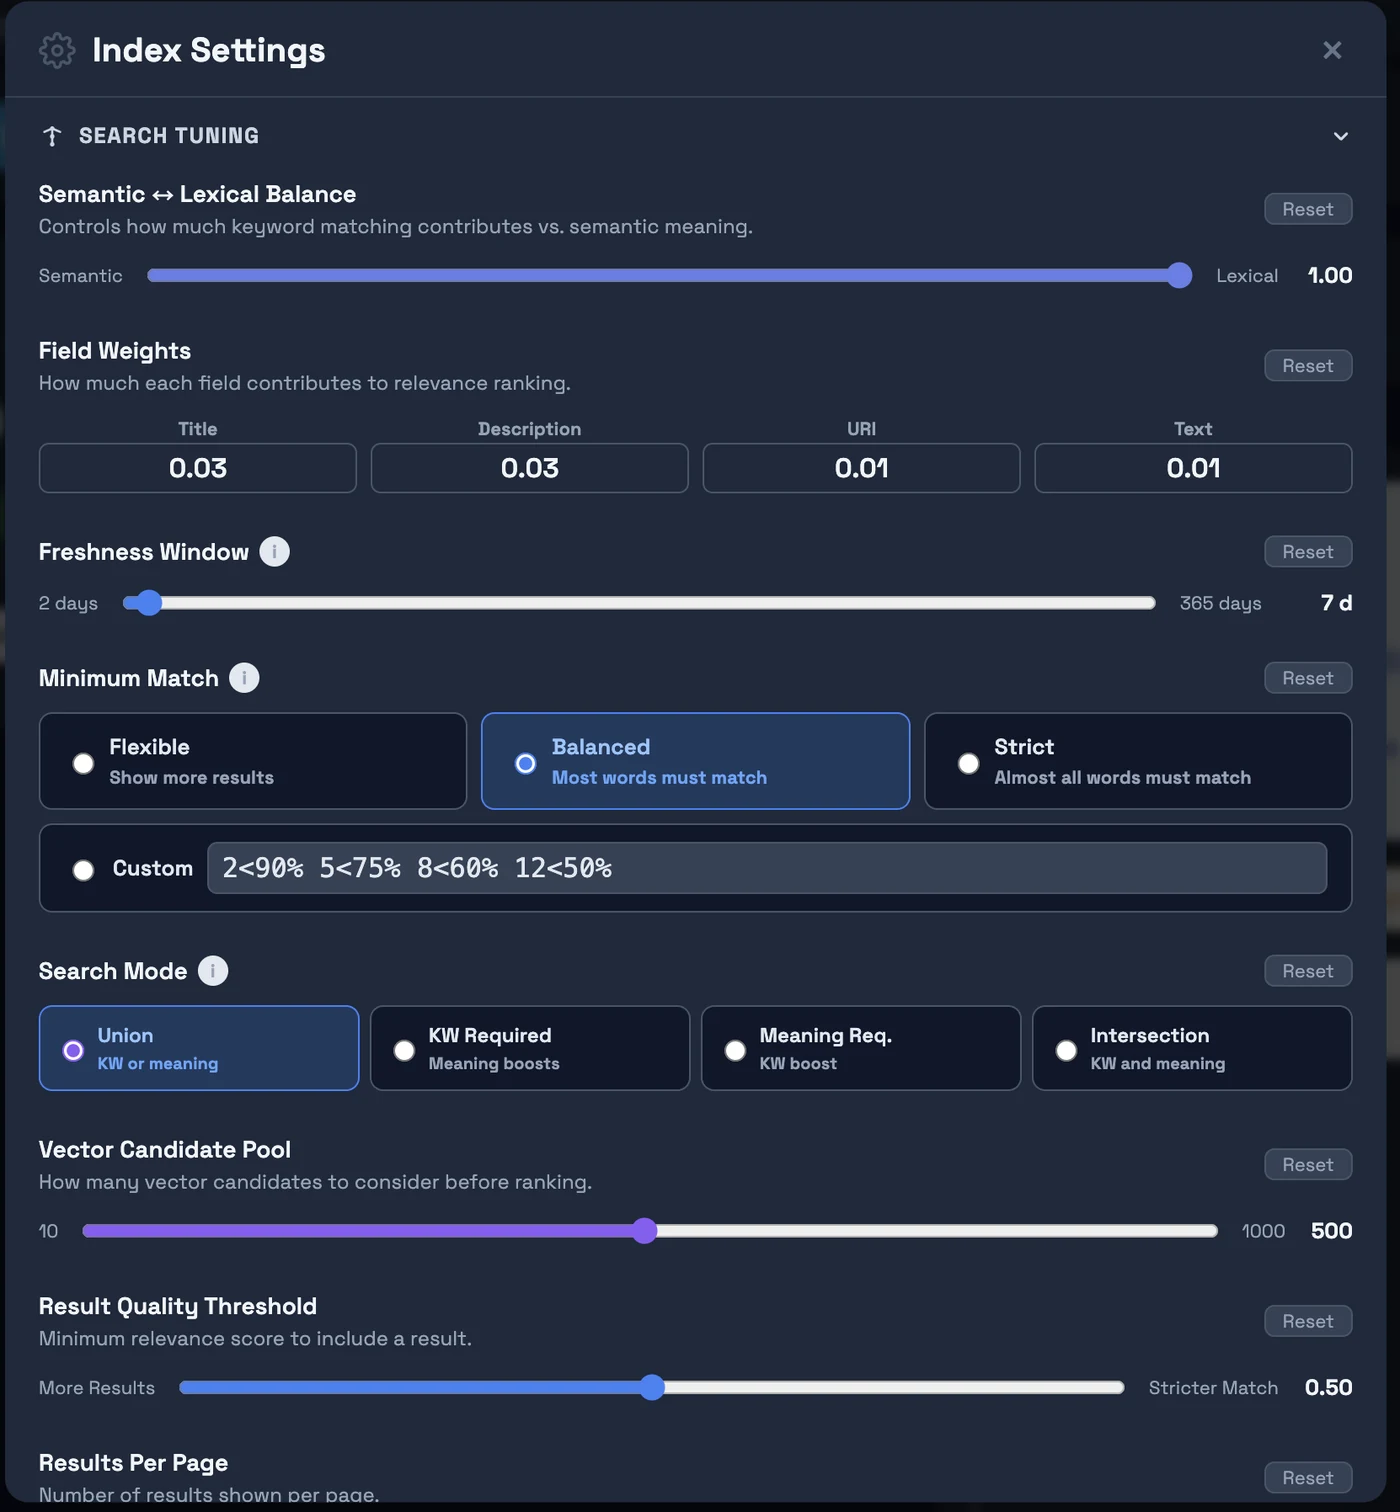
Click Change Settings to set crawl mode, threads, renderer, and content types. Expand Search Tuning to configure freshness, minimum match, and semantic/keyword balance. Use Keep Index Fresh to schedule automatic re-crawling of all indexed pages — keeps content and prices up to date, and removes dead pages from your index.
The crawler runs on a schedule in the background. Pages are fetched, extracted, embedded (BGE-m3 vectors + sentiment + language auto-detection), and indexed automatically. Your live search is at: https://search.opensolr.com/YOUR_INDEX_NAME
What You Get Out of the Box
BGE-m3 1024-dim embeddings + BM25, automatically combined. Finds semantically relevant results even when query words don't appear in the document.
Learn more →
LLM-generated answers from your indexed content, streamed in real time. Powered by GPU-accelerated inference on every crawler-enabled server.
Learn more →
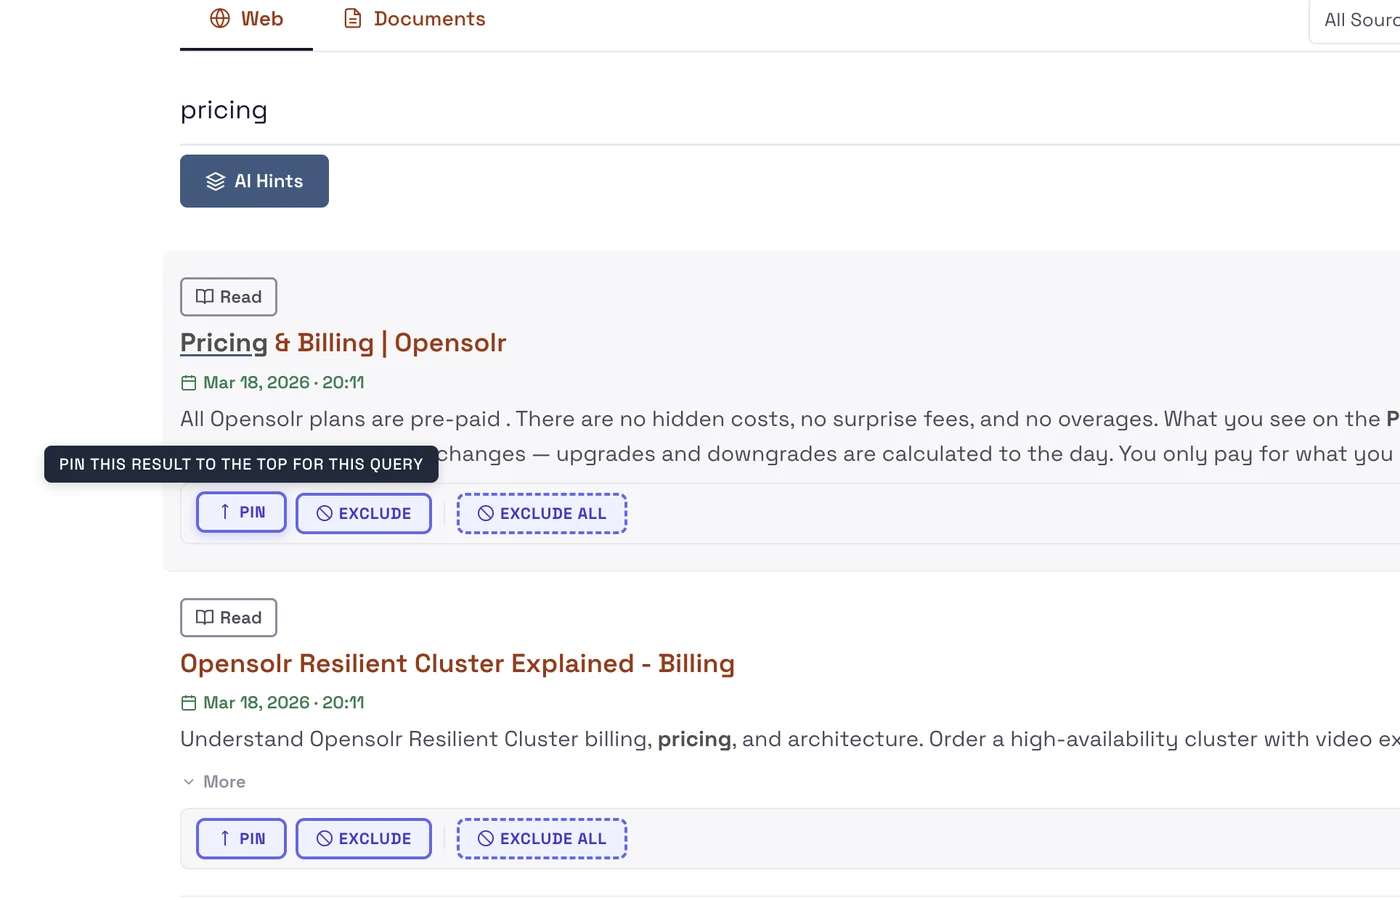
Pin specific results to the top for a query, or exclude pages you don't want surfaced. Full editorial control over your search results.
Learn more →
See what users search for, which queries return no results, click-through rates per result, and search volume trends — all in your dashboard.
Learn more →
See pages crawled, errors, HTTP status codes, skipped URLs, and crawl queue depth — live. Identify content gaps and broken pages immediately.
Learn more →
Schedule automatic re-crawling of all previously indexed pages every 7–365 days. Content, prices, and metadata stay up to date. Pages that return 404 or 500 are automatically removed from your search index.
One script tag adds the full search UI to any website — WordPress, Shopify, static HTML. Dark/light themes, mobile-first, autocomplete included.
Learn more →
When used with the Opensolr Search Drupal module, every page automatically gets canonical URLs, Open Graph tags, Twitter Cards, meta descriptions, JSON-LD structured data (Article & Product schemas), and an auto-generated XML sitemap. Built for the crawler — but Google loves it just as much.
Ready to build your search engine?
Free trial — no credit card required. Live in minutes.